
How to Write Your First Friendica Post

If you’re not logged on to friendica do that now. If you’re using the instance for subscribers to this substack go to https://friendica.unicorns.social and log on. If you’ve not created an account yet and are now ready to take the leap click the subscribe button below and then start your friendica journey with the first note in this series: How to Create a Friendica Account.
When you first log in there is a lot to take in. For the time being let’s ignore most all of this and go to a page with fewer distractions. Click the icon in the menu bar that looks like a house. If you’ve not worked ahead on your own your page will look something like this:

Click the “New Post” icon in the upper right corner of the page. When you click the “New Post” icon the following window will pop up. I’m going to cover only some of the things you see on that pop-up window in this note. The rest will be covered in subsequent notes.
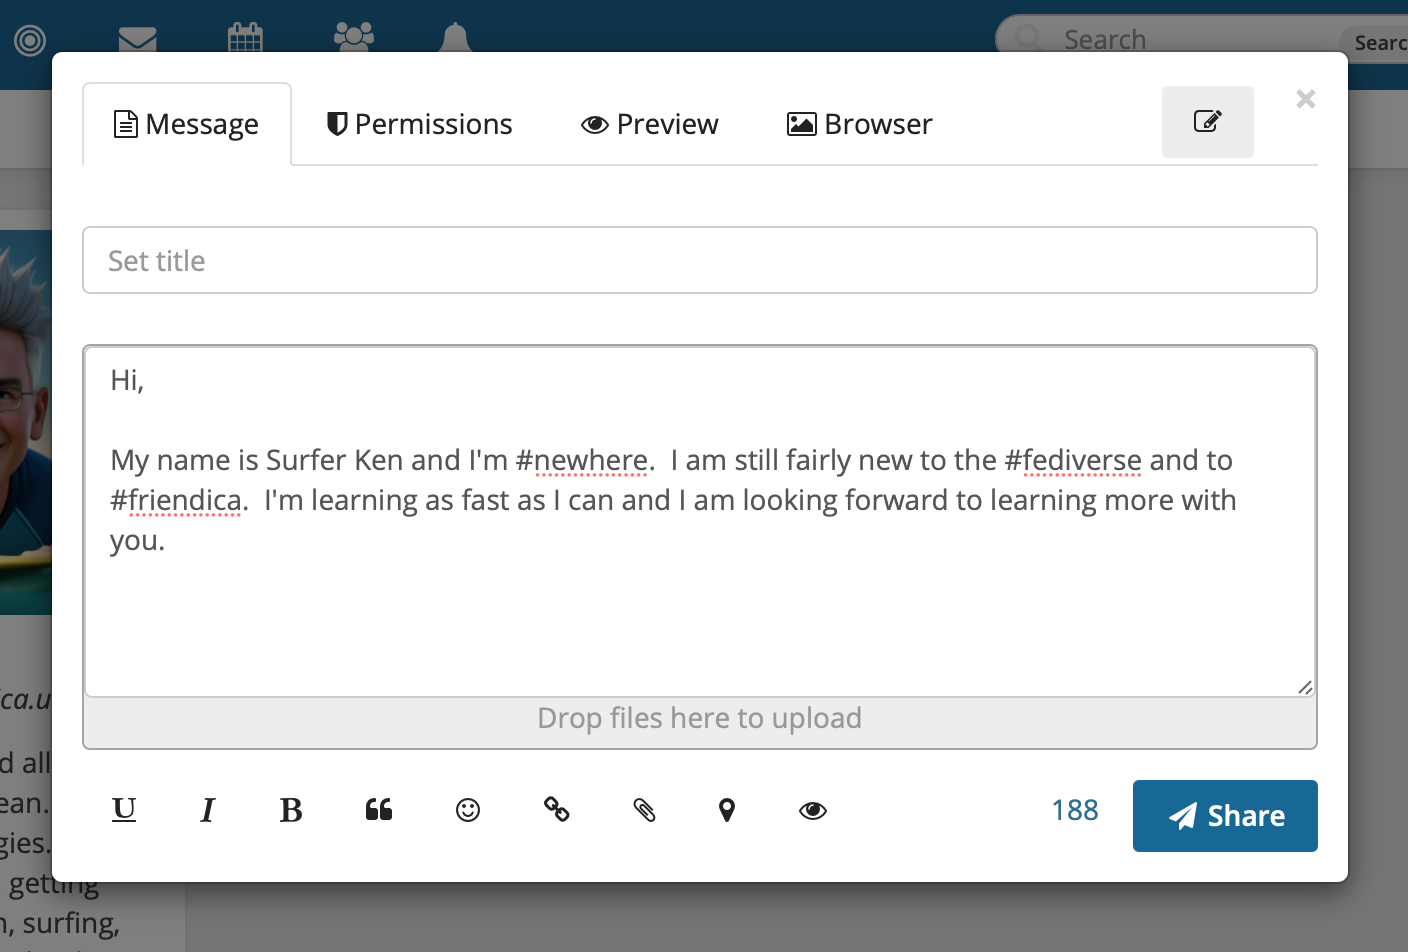
When writing your introductory note I recommend that you use the #newhere hashtag / keyword. When we cover saved searches you may want to save a search for the keyword so you are able to greet new folks who join our community. You can also include any introductory information you care to share. This purpose of this post is to say hello to folks who are already here and give them a chance to welcome you. It will be a great way to meet new folks and find friends who already have accounts in the fediverse.
The “Set title” field is optional. It is normally used for longer posts. If you have not yet done so please enter a brief note in the field that says “Share” (when empty - if you’ve typed anything in you will not see that any longer). Please be sure to incude at least the #newhere hashtag.
There are a number of formatting options at the bottom of the window. Friendica uses a markup language called BBCode to format posts. I will cover BBCode and formatting text in your posts in a future note. For those who either know HTML, BBCode, markdown, or similar formatting schemes you can view the friendica BBCode reference here. For now we’re going to skip this. Once you have written your post that please click the “Permissions” tab.

The “Permissions” tab should look familiar to you if you have been following the tutorial. You would have previously seen the top portion of this when we added custom fields to your profile. If you click “Limited/Private” you will have the same options to permit / exclude classes of your friends / followers / etc. The purpose of this post is to help you be discovered so it makes sense to leave the setting “Public” for now.
The “CC: email addresses” field will allow you to send the content of this post via e-mail if you have configured the settings for your e-mail server in your account settings. We haven’t covered that topic yet so let’s leave that blank for now.
“Scheduled at” will allow you to schedule your post to be published at some future date and time. For now leave that field empty to post immediately.
If you wish to see a preview of your post you can click the “Preview” tab. This tab is very helpful if you have formatted your post using the buttons at the bottom of the editor on the “Message” tab or if you have manually entered BBCode to format your message. You will be able to verify that everything looks as it should before clicking the “Share” button.

Now click the “Share” button to send your message to the fediverse and be prepared for folks to welcome you into the fold! Once you click “Share” you should be returned to your “Conversations” page that now displays your first friendica post.

Congratulations! You’ve successfully announced yourself to the fediverse. Now click the button below to learn now to follow your first person and get rid of that “No contacts” message.